Coastal salt air and freeze-thaw cycles silently damage Long Island masonry. Catching mortar failure early prevents expensive rebuilds and protects your property investment for decades.
Share:

Summary:
Your mortar joints are designed to fail before your bricks or stones do. That’s not a flaw, it’s intentional. Mortar acts as a buffer, absorbing movement and moisture that would otherwise crack the masonry units themselves. When mortar starts deteriorating, it’s doing its job by sacrificing itself to protect the more expensive materials.
The problem is that most homeowners don’t recognize the warning signs until damage has spread beyond the joints. Crumbling mortar looks harmless at first. Maybe you notice some sandy texture when you touch the wall, or small gaps appearing between bricks. By the time mortar is visibly falling out, water has already been infiltrating the wall for months or even years.
Check your masonry for soft spots that crumble when you scratch them with a screwdriver. Look for cracks running through the joints or straight through the bricks themselves. Pay attention to any bricks or stones that shift when you push on them. White chalky deposits that keep reappearing after you clean them signal ongoing moisture problems. If you see dampness or discoloration on interior walls near exterior masonry, water is already making its way through failed joints.

Water is the real enemy of masonry, especially in climates where temperatures regularly drop below freezing. When water gets into mortar joints or porous brick, it sits there waiting for cold weather. The moment temperatures drop, that water freezes and expands by roughly nine percent. That expansion generates tremendous pressure from inside the masonry itself.
One freeze-thaw cycle won’t destroy your wall. But Long Island winters bring dozens of these cycles every season. Each time water freezes and thaws, it pushes a little harder on the surrounding material. Over years, this relentless pressure causes spalling, where the surface of bricks or stones starts flaking away in layers.
You’ll recognize spalling when you see it. The face of the brick looks like it’s peeling off in thin sheets. Sometimes chunks fall away completely, leaving pitted surfaces behind. Once spalling starts, it accelerates quickly because damaged surfaces absorb even more water, which leads to more freeze damage, which creates more surface area for water absorption. It’s a cycle that feeds itself until you intervene with professional masonry services.
The real danger isn’t just cosmetic. When water penetrates deep into masonry through failed mortar joints, it reaches the interior structure. That means potential damage to wood framing, insulation, drywall, and anything else behind your exterior walls. What started as a minor mortar issue becomes a major renovation project involving multiple trades and tens of thousands of dollars.
Coastal properties face an additional challenge that accelerates this process. Salt particles from ocean air land on masonry surfaces and attract moisture even when it’s not raining. This constant dampness means your masonry never fully dries out between weather events. The combination of salt exposure and freeze-thaw cycles creates conditions that deteriorate mortar joints two to three times faster than properties just a few miles inland.
Living near the coast comes with trade-offs. You get beautiful water views and ocean breezes. Your masonry gets a constant assault from salt particles that most inland properties never experience. Those microscopic salt crystals land on every exterior surface, and they don’t just wash away with the next rain. They embed themselves in porous materials and actively pull moisture from the air.
Salt is hygroscopic, which means it attracts and holds water molecules. When salt particles penetrate mortar joints or brick surfaces, they create persistent damp conditions even during dry weather. This ongoing moisture exposure prevents masonry from properly drying out between storms or humid periods. Materials that stay damp deteriorate faster because they never get the chance to fully cure and harden after getting wet.
The corrosion process works slowly but relentlessly. Salt-laden moisture penetrates mortar, then evaporates and leaves salt crystals behind. These crystals expand as they form, creating pressure from inside the mortar matrix. Over time, this expansion weakens the bond between mortar and masonry units. You’ll notice it first as a powdery white residue on the surface, then as actual gaps forming at the joints.
Metal components in your masonry suffer even more dramatic damage from salt exposure. Any steel reinforcement, wall ties, or metal lintels corrode much faster in coastal environments. When these metal elements rust, they expand and crack the surrounding masonry. A rusted lintel above a window or door can crack the entire opening, requiring extensive repairs that go far beyond simple mortar work.
Properties within a mile of the coastline need more frequent masonry maintenance than homes further inland. What might be a twenty-year maintenance cycle elsewhere becomes a ten to fifteen-year cycle near the water. This isn’t a defect in the construction, it’s simply the reality of building in coastal zones. Understanding this helps you plan preventive maintenance before problems force emergency repairs.
The good news is that proper maintenance from experienced residential masonry contractors can protect coastal masonry effectively. Regular inspections catch deterioration early. Breathable sealants designed for masonry can reduce water absorption without trapping moisture inside walls. Repointing with the correct mortar mix restores protection before damage spreads to the masonry units themselves. The key is treating coastal exposure as an ongoing maintenance requirement rather than waiting for visible failure.
There’s a window of opportunity with masonry problems. Catch them early enough, and you’re looking at targeted repairs that cost hundreds or low thousands of dollars. Miss that window, and you’re facing complete rebuilds that run five to ten times higher. The difference comes down to whether damage is still confined to mortar joints or has progressed to structural compromise.
Mortar joints are designed to be the sacrificial component in masonry systems. They’re intentionally softer than the bricks or stones they hold together. When properly maintained, you can repoint failing mortar every twenty to thirty years and the masonry units themselves can last a century or more. But if you let mortar deteriorate completely, water infiltration damages the bricks, stones, and everything behind them.
Working with a masonry company with local experience helps you assess whether your situation still qualifies for repair or has crossed into rebuild territory. We look at how much mortar has failed, whether masonry units are damaged, if there’s structural movement, and what’s causing the deterioration in the first place. Honest stone masonry contractors will tell you when repairs make sense and when you’re throwing money at a problem that needs more comprehensive work.
Numbers matter when you’re deciding whether to address masonry problems now or later. Repointing mortar joints typically runs between three and twenty dollars per square foot, depending on the wall’s height, accessibility, and how much prep work is needed. For a typical repair covering a hundred square feet, you might spend anywhere from five hundred to two thousand dollars.
Compare that to what happens when you wait too long. Replacing spalling bricks costs a thousand to thirty-five hundred dollars for a hundred square feet. If the wall is bowing or bulging from structural failure, you’re looking at two thousand to sixty-five hundred per hundred square feet. Full restoration projects that involve cleaning, repointing, replacing damaged units, and waterproofing start at five thousand and can easily exceed twenty thousand for larger areas.
The cost difference becomes even more dramatic when you factor in secondary damage. Water that penetrates failed masonry doesn’t stop at the exterior wall. It damages insulation, rots wood framing, creates mold problems, stains interior finishes, and can compromise your home’s structural integrity. Suddenly you’re not just paying for masonry work, you’re paying for remediation, framing repairs, insulation replacement, and interior reconstruction.
Preventive maintenance costs less than emergency repairs, which cost less than rebuilds, which cost less than rebuilds plus interior damage restoration. Every stage you move down that progression, costs multiply. The homeowners who spend the least over the life of their property are the ones who invest in regular inspections and address problems while they’re still minor.
Long Island’s higher labor costs and stricter building codes mean masonry work here runs above national averages. Minor repairs might start around two hundred fifty dollars, while major structural work can easily exceed several thousand. Emergency work during freezing weather or after storm damage typically costs twenty to fifty percent more due to urgency and difficult working conditions. None of this makes maintenance optional, it makes it more important. The cost of preventive repairs is always less than the cost of rebuilding a failed wall, not to mention the potential damage to your property if the wall fails completely.
Quality masonry repair involves more than just stuffing new mortar into old joints. Professional masonry services start with assessment to understand what’s causing the deterioration. Is it poor drainage directing water against the wall? Foundation movement creating stress cracks? Improper mortar mix from previous repairs? Missing flashing above openings? The repair method depends entirely on the root cause.
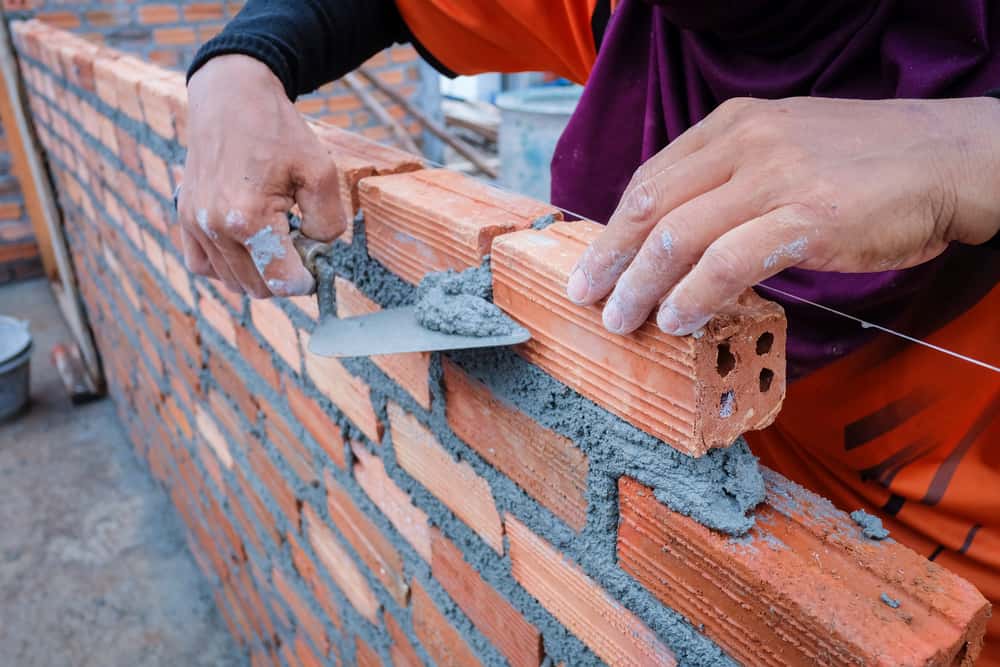
Proper repointing requires removing failed mortar to an adequate depth, usually about three quarters of an inch to an inch. Shallow repairs look fine initially but fail quickly because there’s not enough depth for the new mortar to properly bond. We use specialized tools to cut out old mortar without damaging the edges of bricks or stones. This prep work takes longer than the actual repointing but determines whether repairs last five years or thirty.
Mortar mixing is where experience matters most. The new mortar needs to match the strength and permeability of the original. Using mortar that’s too hard causes the bricks themselves to crack because the joints won’t absorb movement and moisture like they should. Using mortar that’s too soft means it will deteriorate faster than the surrounding material. Color matching matters for appearance, but strength matching matters for longevity.
After repointing, proper curing is essential. Mortar needs time to harden gradually while maintaining adequate moisture. If it dries too quickly, it won’t develop full strength and will crack prematurely. We protect fresh mortar from direct sun, wind, and temperature extremes during the curing period. We understand that rushing this phase undermines all the careful work that came before.
Comprehensive masonry services also address the conditions that caused deterioration in the first place. That might mean improving drainage, adding or repairing flashing, applying breathable sealants, or correcting grading issues that direct water toward foundations. Fixing the symptom without addressing the cause just means you’ll be calling for repairs again in a few years.
Working with residential masonry contractors who understand Long Island’s specific challenges makes a measurable difference in how long repairs last. Coastal conditions, freeze-thaw cycles, local soil characteristics, and building code requirements all factor into proper repair specifications. With decades of local experience, we’ve seen what works and what fails in this environment. That knowledge base is worth having on your side because it prevents you from becoming someone else’s learning experience.
Your masonry isn’t going to fix itself, and it’s not going to stop deteriorating just because you’re not looking at it. Coastal conditions, freeze-thaw cycles, and simple aging will continue breaking down mortar joints whether you address them or not. The only variable you control is whether you catch problems while they’re still manageable or wait until they become structural emergencies.
Regular inspections give you the information you need to make smart decisions. Look at your masonry after winter ends and before fall begins. Check for any changes in cracks, new areas of crumbling mortar, or signs of water infiltration. When you spot problems early, you have time to plan repairs, get multiple estimates, and schedule work during favorable weather. When you ignore problems until they force your hand, you’re making decisions under pressure with limited options.
The masonry on your Long Island property represents a significant investment in your home’s structure, appearance, and value. Protecting that investment doesn’t require dramatic action, it requires consistent attention and timely maintenance. For professional masonry services that understand coastal challenges and prioritize repairs that actually last, we bring over twenty years of experience to every project in Suffolk County, NY and Nassau County, NY.
Article details:
Share:
Continue learning: