5 Driveway Sealcoating Mistakes That Cost Homeowners Thousands

Most driveway sealcoating failures aren't about bad luck — they're about skipped steps, wrong timing, and contractors who cut corners. Here's what to watch for.

Share:

Creating Beautiful and Functional Outdoor Living Spaces with Bricks, Stones, and Concrete Blocks

Masonry in landscaping is essential to designing and constructing an attractive and functional outdoor living space. Masonry is the art of building structures using bricks, stones, and concrete blocks. It is an ancient trade that has been used for centuries to create structures that are both functional and aesthetically pleasing.

Landscaping is the process of designing, planning, and creating attractive, functional, and sustainable outdoor living spaces. It involves the use of plants, water features, lighting, and other elements to create an outdoor environment that is both beautiful and practical.

Masonry plays a crucial role in landscaping as it helps to create a solid and durable foundation for various outdoor living features such as patios, walkways, retaining walls, fireplaces, and water features. In this blog, we will explore the various ways masonry can be used in landscaping and the benefits it provides.
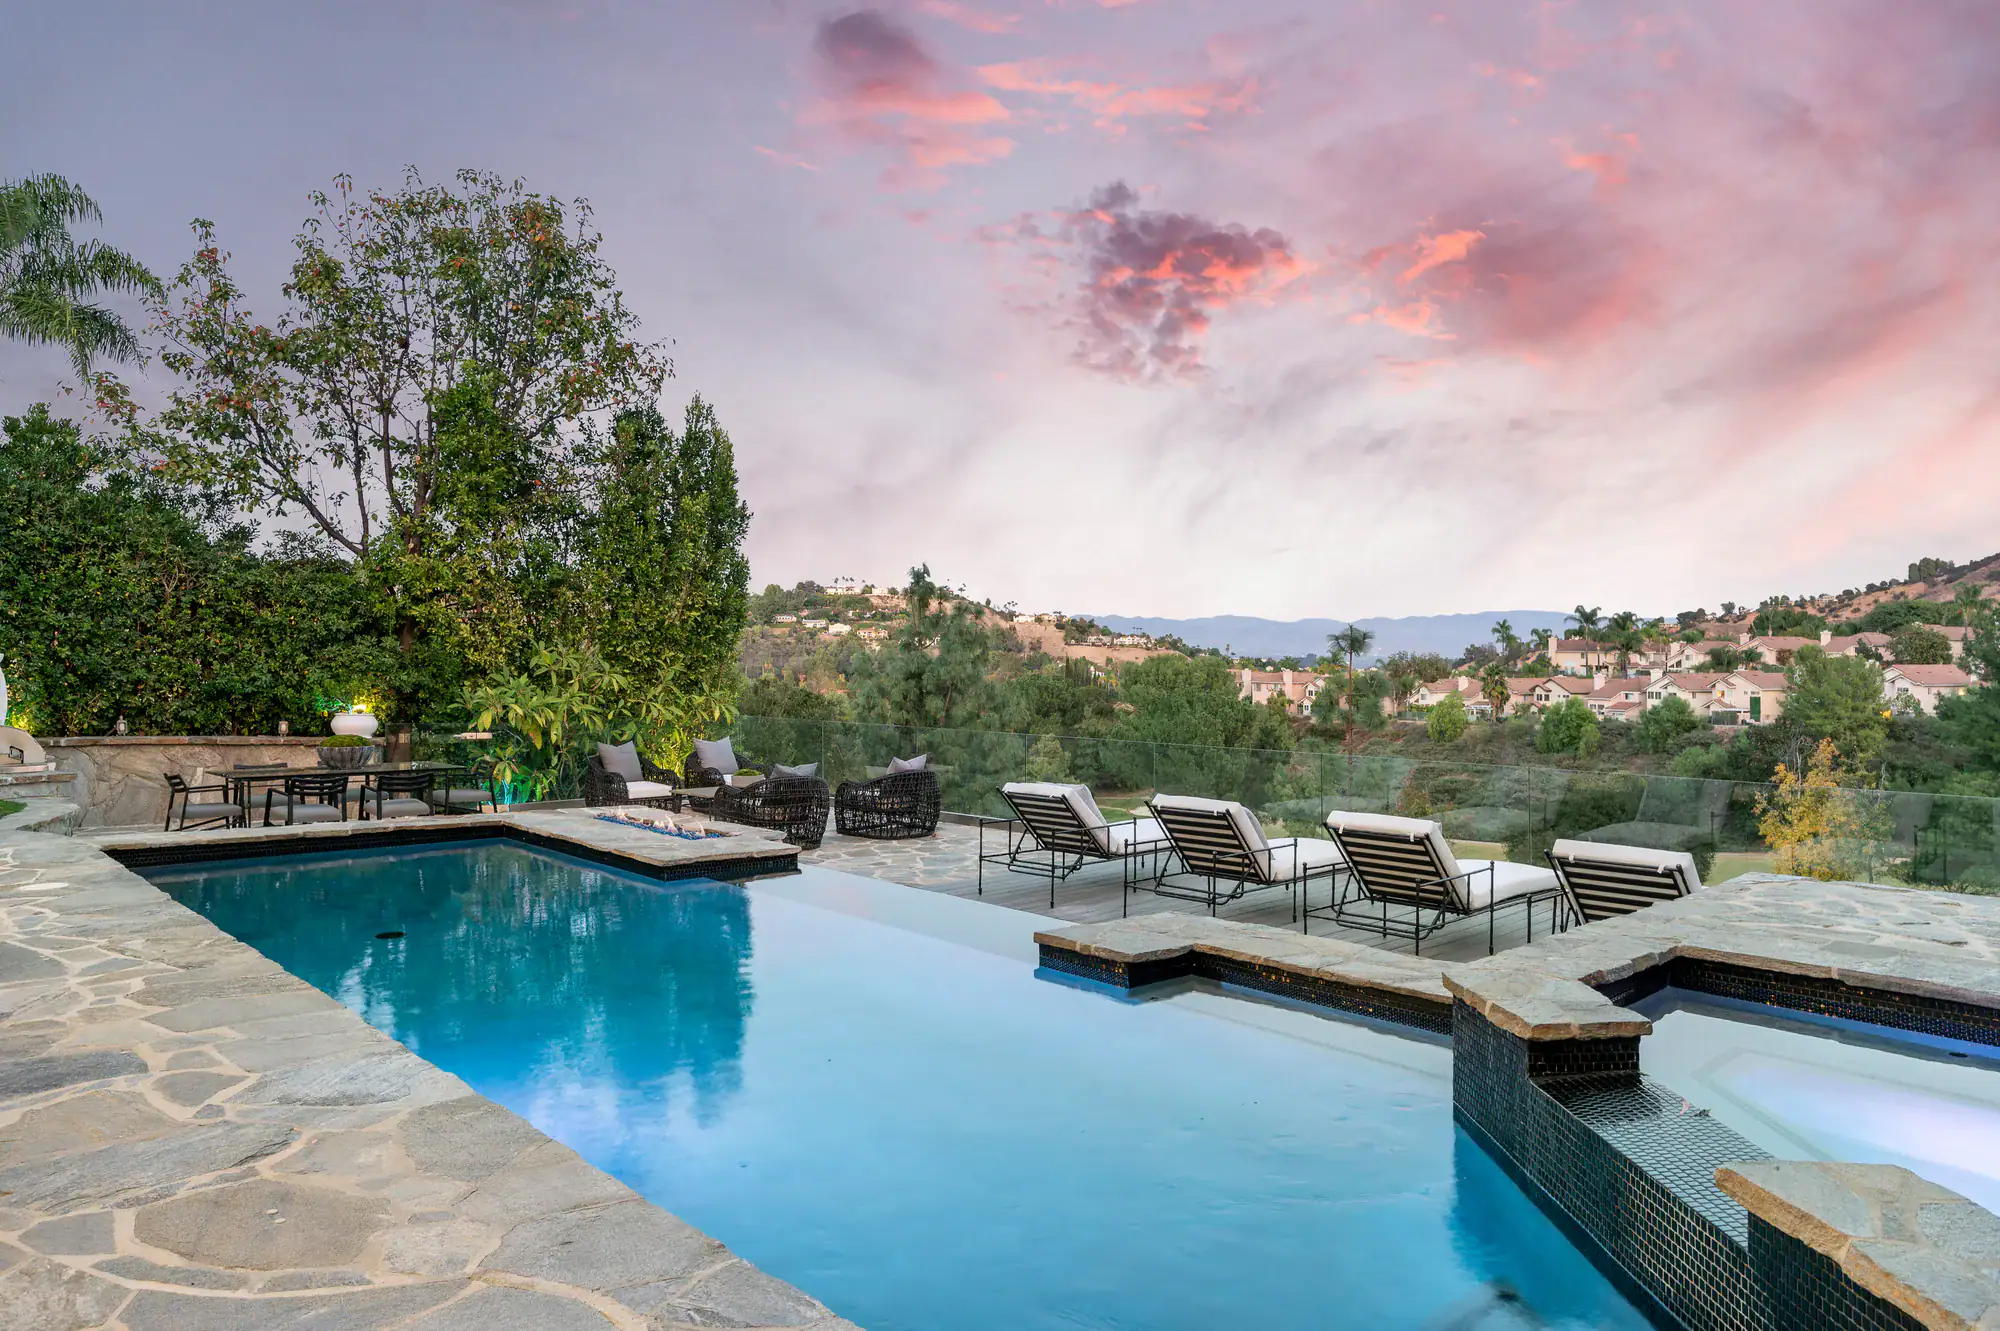
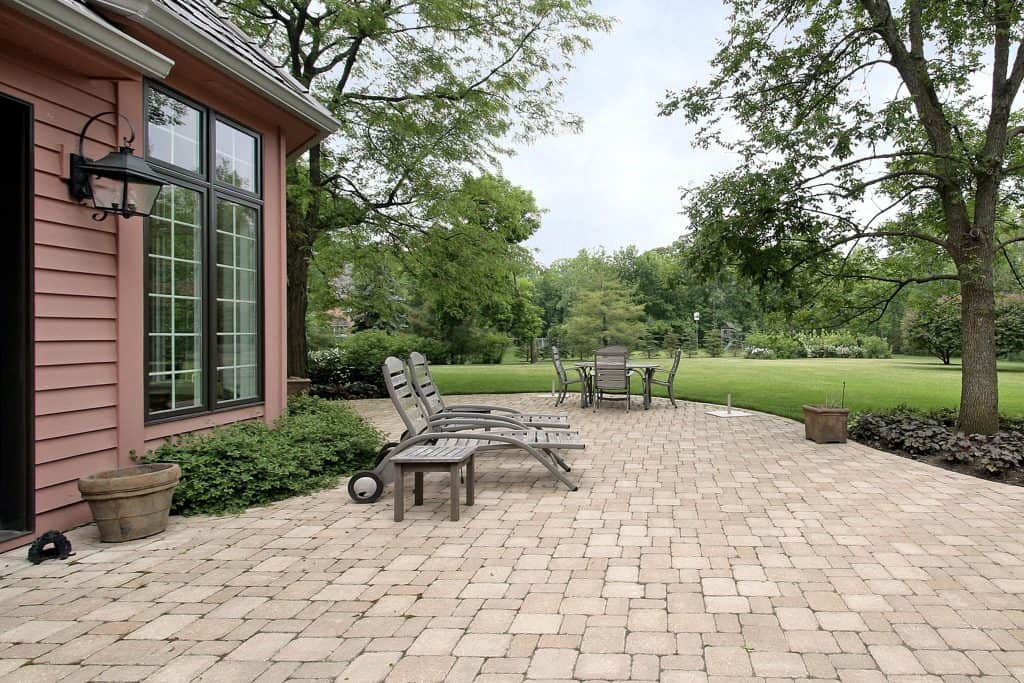
Patios

Patios are outdoor living spaces typically made of concrete or stone. They are a popular feature in landscaping as they provide a comfortable area for dining, entertaining, and relaxation. Masonry is an ideal material for creating patios as it is durable, low-maintenance, and can be customized to suit any design style.

Masonry patios can be made using a variety of materials such as bricks, stones, and concrete blocks. These materials can be arranged in different patterns and designs to create an attractive and attractive outdoor living space. Masonry patios are also resistant to weathering, erosion, and pests, which makes them a practical and long-lasting option.

Walkways

Walkways are paths that lead from one area of the outdoor living space to another. They are typically made of concrete, stone, or pavers and can complement the overall landscaping design. Masonry is an ideal material for creating walkways as it provides a solid and stable surface that can withstand heavy foot traffic and the elements.

Masonry walkways can be made using a variety of materials such as bricks, stones, and concrete blocks. These materials can be arranged in different patterns and designs to create an attractive and attractive walkway that complements the overall landscaping design. Masonry walkways are also low-maintenance and can be easily cleaned and repaired if necessary.

A spacious brick patio, expertly crafted by a masonry contractor Long Island, NY, features lounge chairs and a dining table set. It’s bordered by a red house and overlooks a large green lawn with trees in the background.

Retaining Walls

Retaining walls are structures designed to hold back soil and prevent erosion. They are a crucial feature in landscaping as they help maintain the integrity of the outdoor living space. Masonry is an ideal material for creating retaining walls as it is strong, durable, and can be customized to suit any design style.

Masonry retaining walls can be made using a variety of materials such as bricks, stones, and concrete blocks. These materials can be arranged in different patterns and designs to create an attractive and attractive foundation wall. This complements the overall landscaping design. Masonry retaining walls are also low-maintenance and durable, making them a practical and long-lasting option.

Fireplaces

Fireplaces are outdoor living features that provide warmth and cozy atmosphere for dining and entertaining. Masonry is an ideal material for creating fireplaces as it is heat-resistant and can be customized to suit any design style.

Masonry fireplaces can be made using a variety of materials such as bricks, stones, and concrete blocks. These materials can be arranged in different patterns and designs to create an elegant and attractive fireplace. This complements the overall landscaping design. Masonry fireplaces are also low-maintenance and durable, making them a practical and long-lasting option.

Summary:

A fresh coat of sealer looks great on day one. But if the prep work was skipped, the timing was off, or the wrong product was used, that driveway will start showing problems within a season — and the repairs won’t be cheap. This post breaks down the five mistakes that cause the most damage to Nassau County driveways, why they happen, and what a properly done sealcoating job actually looks like from start to finish. If you’re trying to figure out whether your driveway needs sealing, repair, or something more, this is a good place to start.
Table of contents

Most Nassau County homeowners don’t think about their driveway until something goes wrong. Then spring arrives, the snow melts, and suddenly there’s a crack running from the garage to the street that wasn’t there last fall. Or the sealer is peeling up in sheets. Or the surface looks worse than it did before it was done.

A lot of that damage is preventable. Driveway sealcoating works — but only when it’s done right. The mistakes that lead to premature failure are almost always the same ones, and they’re more common than you’d think. Here’s what they are, why they happen, and what it actually costs when they go uncorrected.

Five Common Driveway Sealcoating Mistakes That Shorten Pavement Life

Sealcoating is one of the most cost-effective things you can do to protect an asphalt driveway. A professional application runs roughly $150–$600 for a standard residential driveway. A full replacement in Nassau County runs $5,000–$12,000. The math isn’t complicated.

But sealcoating only works if it’s applied correctly. When it isn’t, you’re not just wasting the cost of the job — you’re often accelerating the damage you were trying to prevent. These five mistakes show up repeatedly on Long Island driveways, and every one of them is avoidable.

Mistake #1: Sealing Over Cracks Without Filling Them First

This is the most damaging mistake on the list, and it happens constantly. Sealcoating is a surface treatment — it protects intact asphalt from UV rays, water, and road salt. It is not a crack filler. It does not bond to the edges of a crack, bridge the gap, or stop water from getting in underneath. When sealer is applied over an unfilled crack, it looks fine for a few weeks. Then it starts to peel away from the edges, and now you have an open crack with compromised sealer around it.

In Nassau County, that crack becomes a serious problem every winter. Water seeps in, freezes, and expands with tremendous pressure — widening the crack from the inside out. Long Island’s freeze-thaw pattern is particularly aggressive because temperatures swing above and below freezing repeatedly throughout the season, not just once. Each cycle does more damage than the last.

The right sequence is always crack filling first, then sealcoating. Cracks need to be cleaned out, filled with a professional-grade crack filler, and allowed to cure before any sealer goes down. Hairline cracks can be addressed with sealer worked into the surface. Anything wider than a quarter inch needs proper crack sealing material. And cracks that have started to spread in a web-like pattern — called alligator cracking — often signal base failure, which means sealcoating isn’t the right call at all.

If a contractor shows up, skips the inspection, and goes straight to applying sealer, that’s a problem. A proper job starts with understanding what you’re working with.

Mistake #2: Sealcoating a New Driveway Too Soon — or an Old One Too Often

Both ends of the timing spectrum cause real damage, and both are common.

New asphalt needs time to cure. The oils and volatile compounds in fresh asphalt have to evaporate through the surface — that’s part of how the pavement hardens and sets. If you seal too early, you trap those compounds underneath. The result is a soft, tacky surface that stays pliable longer than it should, and a sealer coat that doesn’t bond properly and fails ahead of schedule. Most professionals recommend waiting at least six to twelve months after a new driveway installation before applying the first coat of sealer. Some go longer depending on the season and conditions.

On the other end, sealing every year causes its own problems. Sealer builds up in layers, and once those layers get too thick, they start to crack and flake. You end up with a driveway that looks like it’s shedding — and stripping old sealer buildup is a much messier and more expensive fix than just staying on a reasonable schedule.

The industry standard for Nassau County driveways is every two to three years. Given Long Island’s freeze-thaw cycles, road salt exposure, and coastal humidity in communities like Long Beach, Oceanside, and Merrick, erring toward every two years makes sense for most properties. That schedule gives the sealer time to wear down naturally while still maintaining protection before the next winter.

The homeowners who get the most out of their driveways aren’t the ones who seal constantly. They’re the ones who seal consistently, on the right timeline, with proper prep done every time.

Driveway Repair in Nassau County: What Has to Happen Before the Sealer Goes Down

Sealcoating gets most of the attention, but the prep work underneath it is what actually determines whether the job holds. Surface cleaning, crack filling, oil spot priming, pothole patching — these aren’t optional steps that we can skip to save time. They’re the reason a sealcoating job lasts three years instead of three months.

Nassau County driveways deal with a specific combination of stressors: road salt from municipal plowing, freeze-thaw cycling, sandy soil that shifts under the surface, and UV exposure from full Long Island summers. A driveway that hasn’t been properly maintained starts showing those stressors quickly. The good news is that most damage, caught early enough, is repairable without replacing the whole driveway.

How to Tell When Driveway Repair Is Enough — and When It Isn't

Not every crack means your driveway is failing. Surface cracks from UV oxidation and minor settling are normal, especially on driveways that are ten years or older. These can be filled, sealed, and managed with regular maintenance. The driveway still has life in it.

The warning signs that something more serious is happening are different. Alligator cracking — that interconnected web pattern that looks like a dried-up riverbed — usually means the base layer beneath the asphalt has started to fail. Sealcoating over it doesn’t fix the base. Neither does crack filling. If the foundation is compromised, you’re dealing with a resurfacing or replacement situation, not a maintenance one.

Potholes are another indicator. A pothole isn’t just a surface problem — it means the asphalt has lost structural integrity in that area. Patching a pothole before sealcoating is the right call for isolated damage. But if you’re patching multiple areas across the driveway, that’s a sign the surface has deteriorated past the point where maintenance alone will hold.

The honest answer most homeowners don’t get is this: a good contractor will tell you when sealcoating isn’t the right solution. If your driveway has widespread cracking, significant base movement, or large areas of surface failure, spending money on sealer is not going to extend its life meaningfully. A proper assessment — before any work is quoted — should include an honest evaluation of what condition the driveway is actually in.

We’ve been doing this work in Nassau and Suffolk counties for over 20 years, and the most useful thing we can do for a homeowner is give you an accurate picture of where your driveway stands. Sometimes that’s good news. Sometimes it means having a conversation about resurfacing or replacement. Either way, you deserve to know what you’re actually dealing with before we start a job.

Driveway Resurfacing: The Middle Option Nassau County Homeowners Often Don't Know About

Most people think they’re choosing between sealcoating and full replacement. There’s actually a third option that makes sense for a lot of Nassau County driveways, and it’s worth understanding before you assume you need to start from scratch.

Driveway resurfacing means applying a new layer of asphalt over the existing surface. It’s not the same as full replacement — the original base stays in place — but it gives you a fresh, structurally sound surface without the cost of tearing everything out and starting over. For driveways where the base is still solid but the top layer has deteriorated significantly, resurfacing can extend the life of the driveway by another ten to fifteen years at a fraction of replacement cost.

The key condition is that the base has to be intact. Resurfacing a driveway with base failure just delays the problem — the new surface will crack and heave along the same fault lines. This is why the assessment matters so much. Knowing whether the base is sound is the difference between resurfacing being a smart investment and a waste of money.

In Nassau County, where full driveway replacement runs $5,000–$12,000 for a standard residential property, resurfacing offers a meaningful middle ground for homeowners who aren’t ready for that expense but whose driveways have gone past the point where sealcoating alone is sufficient. It’s a legitimate option that gets skipped over in conversations that jump straight from “maintenance” to “full replacement.”

If you’re in a community like Garden City, Rockville Centre, Levittown, or Massapequa — where a lot of the housing stock dates back to the 1950s and 1960s — there’s a good chance your driveway has been repaved at least once already. Understanding its current condition and what options are actually on the table is the starting point for making a good decision.

What Good Driveway Sealing Actually Looks Like — and How to Find It in Nassau County

The five mistakes covered here — sealing over unfilled cracks, wrong timing, skipped surface prep, using diluted consumer-grade products, and hiring a contractor who won’t be accountable when problems show up — account for the majority of driveway sealcoating failures on Long Island. None of them are complicated to avoid. They just require a contractor who actually does the job right instead of cutting corners to move faster.

A driveway that’s properly sealed and maintained every two to three years can last 20 years or more in Nassau County’s climate. One that’s neglected, or maintained badly, often needs replacement within a decade. The difference in cost between those two outcomes is significant — and most of it comes down to the quality of the work, not the product.

If you’re not sure where your driveway stands — whether it needs sealing, crack repair, resurfacing, or something more — that’s exactly the kind of assessment we do before we quote anything. We’ve been working in Nassau and Suffolk counties for over 20 years, and we’re happy to take a look and give you a straight answer about what’s actually going on and what makes sense to do about it.

**Frequently Asked Questions**

**How often should I sealcoat my driveway in Nassau County?** Every two to three years is the standard recommendation for Nassau County driveways. The climate here — with its repeated freeze-thaw cycles through winter and road salt exposure from municipal plowing — puts more stress on asphalt than many other markets. For driveways in coastal communities like Long Beach or Merrick, where humidity and salt air add to that wear, staying closer to the two-year mark makes sense. Going longer than three years leaves your asphalt unprotected during the winters that do the most damage.

**Can I sealcoat my driveway myself with store-bought sealer?** You can, but it’s worth knowing what you’re getting. Consumer-grade sealants sold at home improvement stores are significantly more diluted than the contractor-grade materials we use. The protection they offer is real but shorter-lived — most DIY applications need to be redone within a year, compared to two to three years for a professionally applied coat. Factor in the time, the prep work required to do it properly, and the risk of applying it in the wrong conditions or over unfilled cracks, and the cost savings often don’t hold up the way they look on paper.

**How long does driveway sealcoating take to dry?** Under good conditions — warm temperatures, low humidity, no rain in the forecast — a freshly sealed driveway needs at least 24 to 48 hours before you drive on it. Cooler or overcast weather can push that to 72 hours or more. We won’t schedule a sealcoating job in Nassau County when rain is expected within 24 to 48 hours, because moisture during the curing window compromises the bond and shortens the life of the application significantly.

**What’s the difference between sealcoating and resurfacing?** Sealcoating is a protective coating applied to the surface of an existing driveway. It doesn’t add structural material — it seals and protects what’s already there. Resurfacing means laying a new layer of asphalt over the existing base, which addresses surface deterioration that sealcoating can’t fix. If your driveway has widespread cracking, significant surface wear, or areas where the asphalt has broken down, resurfacing is often the right call before sealcoating becomes useful again. The base needs to be structurally sound for resurfacing to work — if it isn’t, replacement may be the better long-term investment.

**How do I know if a sealcoating contractor in Nassau County is legitimate?** Ask for proof of insurance and confirm they’ll pull any required permits — Nassau County municipalities including the towns of Hempstead, North Hempstead, and Oyster Bay each have their own requirements for driveway work, and a contractor who skips that process is cutting corners that can create problems for you down the road. Be cautious of door-to-door contractors offering unusually low prices from trucks, which is a common pattern on Long Island. A quote that’s 25% or more below others in the market is often a sign of uninsured labor, watered-down materials, or both. Ask what product they’re using, how many coats, and what the prep process looks like — a contractor who can’t answer those questions clearly is one worth passing on.

Article details:

Share: